Ubuntu on Hyper-V
by Mathieu Poliquin
EDIT 2022:
If you mostly need the command line and want GPU support even in Windows 10/11 Home edition using the new WSL2 (windows Subsystem for Linux 2) is much easier. It also supports X11 graphical apps. https://www.videogames.ai/Install-WSL2-Linux-Windows-GPU-Support
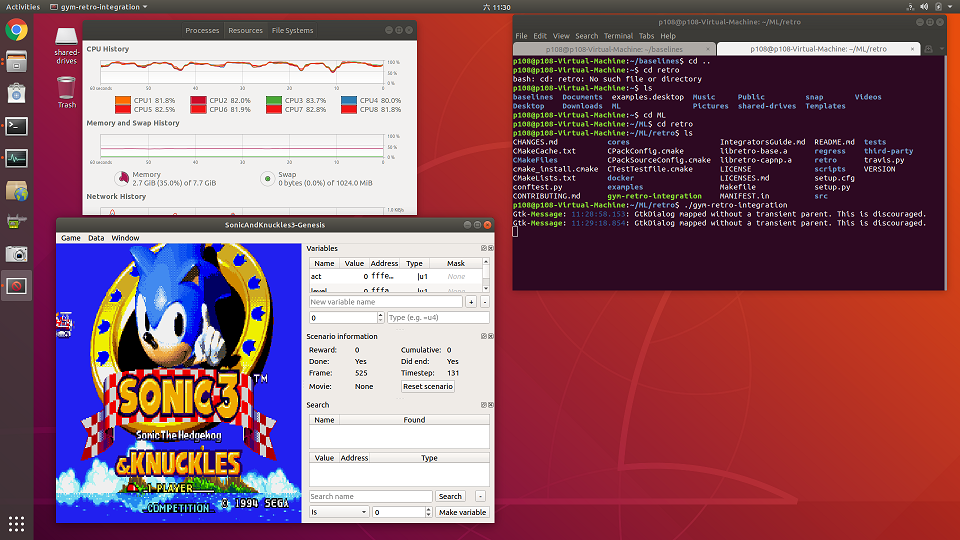
Screenshot of Ubuntu running on Hyper-V
I often need to use both Windows and Linux for various projects. I was dual booting Linux and Windows 10 on my laptop but constantly rebooting was getting quickly annoying so recently I decided to try Hyper-V since it comes for free with my Windows 10 Pro.
Important notes so you don’t waste time:
- If you need to do long hours or heavy workloads on Ubuntu than dual-booting is better. As an example, On my desktop, at office, I dual boot since I often need to debug/program. I use the Ubuntu vm on my laptop at home or on the road, mostly to do some light and quick maintenance for that it’s good.
- If you absolutely need gpu support, please run the compatiblity script first (in the GPU section bellow) before installing.
- If you require a VM and want the greatest hardware support you might want to check VMWare vSphere or virtual box instead.
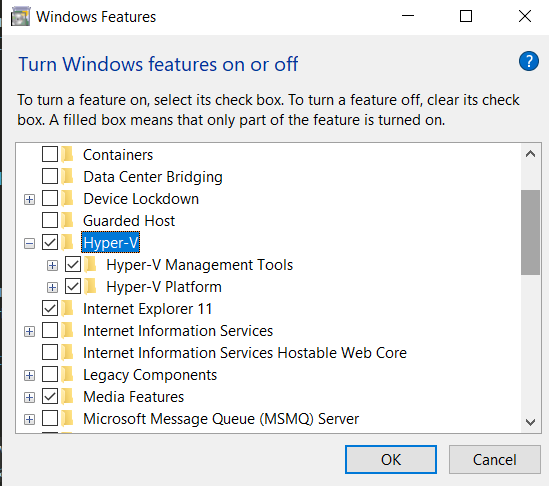
Step 1 - Enable Hyper-V features in windows
In Control Panel find the Windows Features section and check out ‘Hyper-V’
Step 2 - Open Hyper-V and Install Ubuntu Enhanced Mode
There is two ways to install Ubuntu:
- Create a standard virtual machine and install Ubuntu like for any other PC
- Use Quick Create and install the special version of Ubuntu 18.04 (Enhanced Mode) provided by Microsoft
I very strongly recommend the second option. It has the following features available throught xrdp pre-installed
- You can use the clipboard from the host
- Much snappier experience, since it’s using hardware acceleration for the screen refresh
- Auto mouse capture
- Shared drive with the host
If you must have a different version of Ubuntu such as 18.10 Cosmic Cuttlefish, it’s possible but you will need to install xrdp
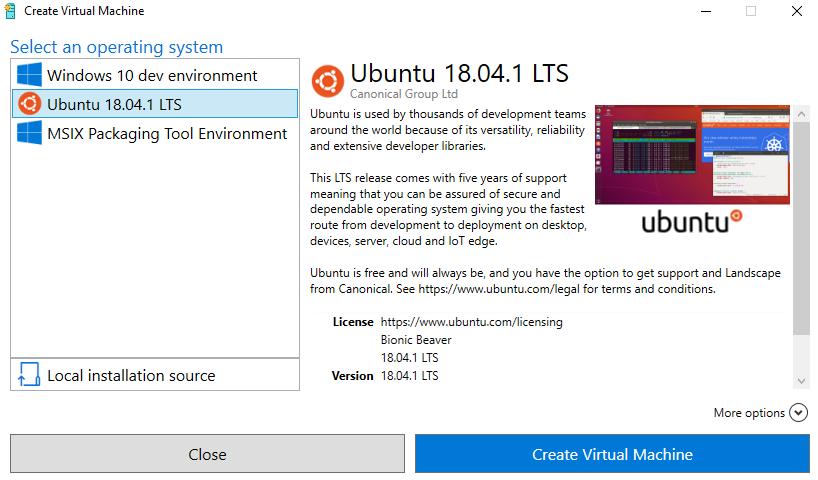
Open the wizard with the menu:
Action->Quick Create
You should see this screen. Select Ubuntu 18.04 LTS and click create
After the wizard finished downloading and creating your VM, you should see it in the list:

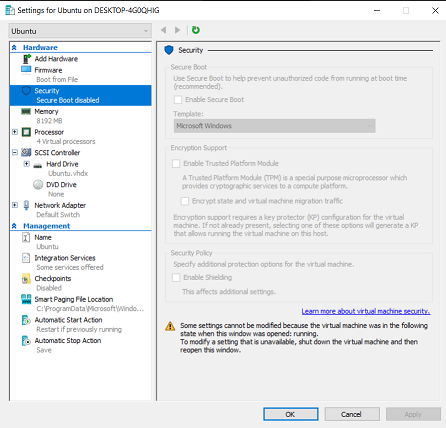
Step 3 - VM Settings
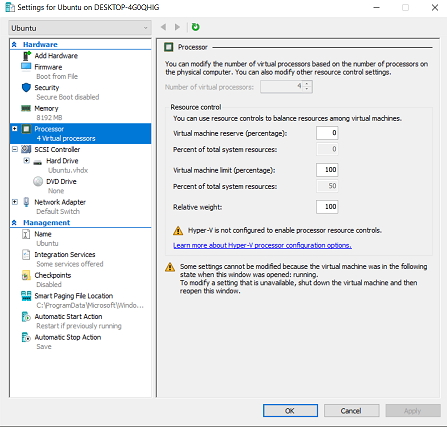
Before starting up you need to change two things in the settings Right-click on your VM in the list and select “settings”
Disable secure boot, (otherwise it won’t boot)
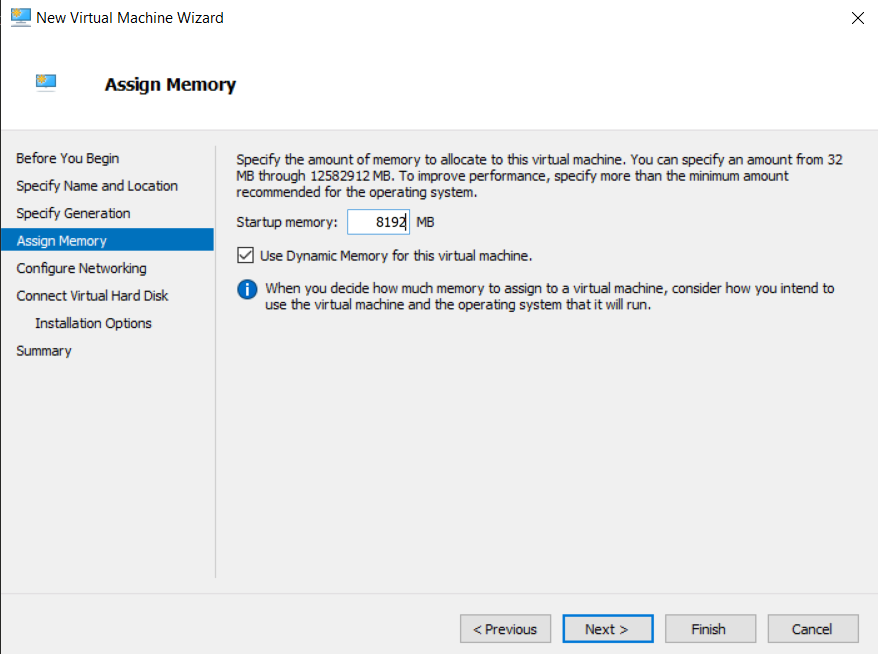
Specify RAM:
Make sure to give it at least 4GB
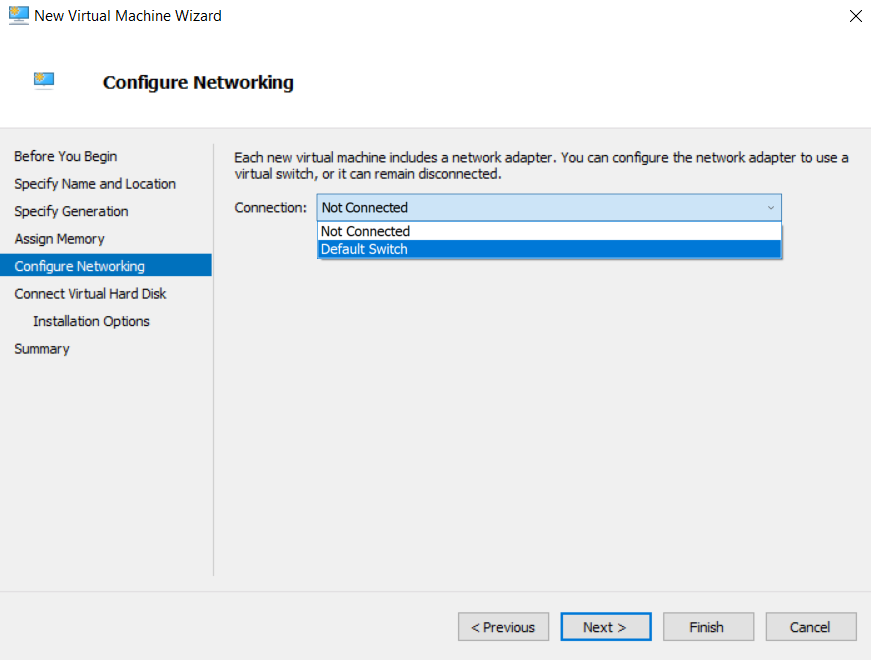
Assign default switch for networking:
Assign at least 2 to 4 processors
To enable which local resources (drives, printers usb devices, etc) you want to expose to Ubuntu Microsoft made a neat doc for it: local resources
Step 5 - Configure Ubuntu
Update the linux kernel to one optimized for Azure VMs
In a terminal:
sudo apt-get update
sudo apt-get install linux-azure
Update and tweaks:
Besure to run the Auto-Updater to make sure you have the latest fixes and optimisations, especially the ones related to Azure
Best Pratices from Microsoft for Ubuntu on Hyper-V
GPU Support
Important Note These steps did not work for me as my laptop hardware doesn’t support this feature, that said I plan to try on other hardware, will update this post when I do
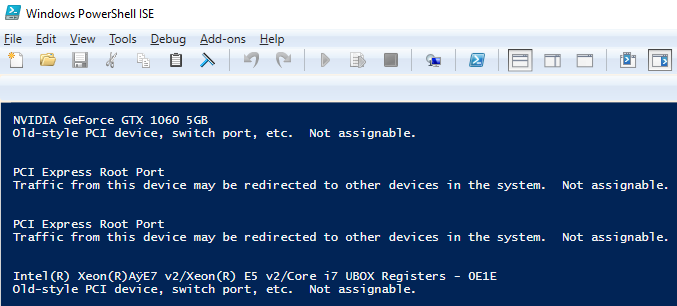
First make sure your hardware is compatible by running this script in a powershell as administrator: survey-dda.ps1 In case you want more about this script, you can read this detailed Microsoft blog post
Running this script you might get an error saying “Execution is disabled on this computer…” In which case you can bypass it by running the command as follows:
powershell -ExecutionPolicy ByPass -File survey-dda.ps1
As you can see my GTX 1060 5GB cannot be assigned, probably because I am running it on a x79 motherboard:
Microsoft recently disabled RemoteFX3D since they are developing a new solution to support GPUs. They only disabled it in the interface (for now), you can enable it via Powershell
Add-VMRemoteFx3dVideoAdapter -VMName YOUR_VM_NAME
Reference: NVIDIA docs
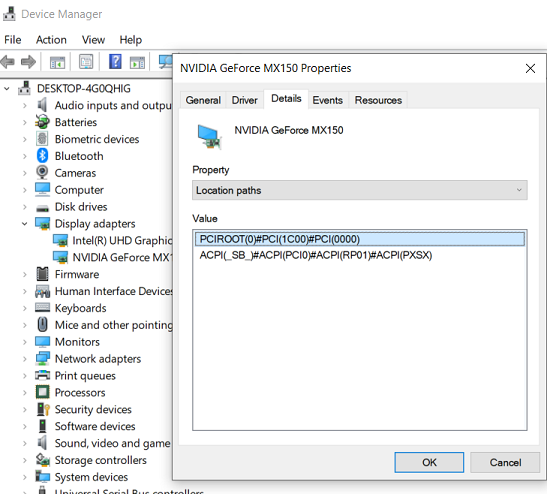
Step 1 - Get the PCI location of your GPU and disable it
Using the device manager, Open the properties of your graphics card.
In the details pane acces Location Paths property and copy it’s value
Disable you GPU from your computer so you can assign it fully to your VM. Right-click on your graphics card in the Device Managet and select Disable
Dismount your graphics card from the host and assign it to your VM Open a powershell as admin and use these commands. Replace the LocationPath and VMName with yours
Dismount-VMHostAssignableDevice -LocationPath "PCIROOT(0)#PCI(1C00)#PCI(0000)" -force
Add-VMAssignableDevice -LocationPath "PCIROOT(0)#PCI(1C00)#PCI(0000)" -VMName Ubuntu
To verify it’s assigned list the assignable devices for your Ubuntu
Get-VMAssignableDevice -VMName Ubuntu
In case you don’t want to use the gpu on yourVM anymore you can use these commands to give it back to your host
Remove-VMAssignableDevice -LocationPath "PCIROOT(0)#PCI(1C00)#PCI(0000)" -VMName Ubuntu
Mount-VMHostAssignableDevice -LocationPath "PCIROOT(0)#PCI(1C00)#PCI(0000)"
After go in Device Manager and Enable your Graphics card
Step 2 - Install vGPU in Ubuntu
NVIDIA provided a section for that: VGPU on Ubuntu
Performance
Performance is of course not as snappy as on native hardware, the mouse lags a little and you can see the windows refresh. Until they improve the performance you will definetly find that it’s annoying to do long hours of programming or other involved work on this, for which I recommend dual booting instead if that is your case. As for me, I have another computer with Ubuntu set up when I need to do heavier work. Otherwise for tweaking and testing scripts Hyper-V Ubuntu VM is fine.
I would recommend having a processor with a decent single-core performance. My Xiaomi Notebook pro have a Intel Core i7-8550U with a single-core performance of over 170 on Cinebench! It peforms better than my Dual Xeon E5-2680v2 which has a 95 single-core Cinebench score, even thought the multi-core performance is 5 times higher!
Performance Test with the VM running on my Xiaomi notebook pro 2017:
python3 -m baselines.run --alg=ppo2 --env=PongNoFrameskip-v4 --num_timesteps=2e7
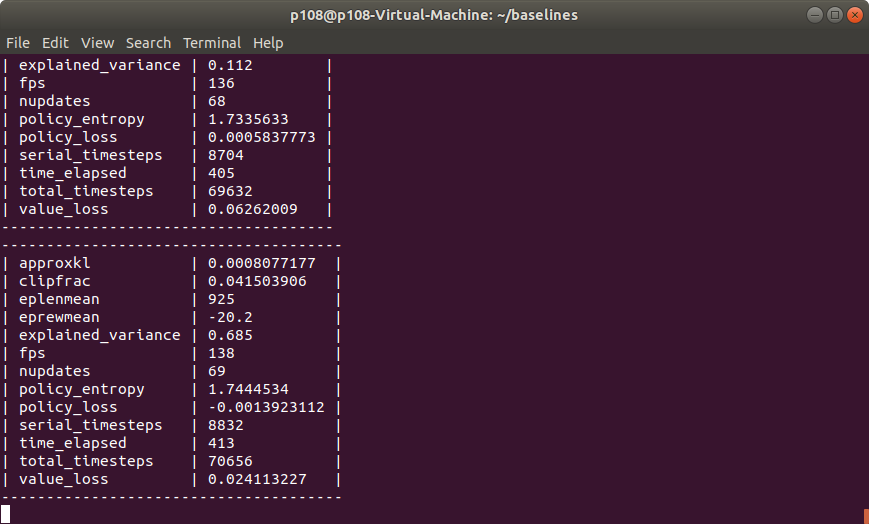
Hardware specs:
- Intel® Core™ i7-8550U
- 16GB of DDR4-2400
tags: ubuntu - hyper-v - linux - gpu - windows