Integrate an emulator in stable-retro/gym-retro
by Mathieu Poliquin
This post is to show how I integrated Sega 32x emulator in stable-retro (an active fork of OpenAI’s gym-retro “lets you turn classic video games into Gymnasium environments for reinforcement learning”) so these steps should mostly work in gym-retro too.
One of the goals in stable-retro’s roadmap is to expand its supported plateforms and support more 3D games, hopefully this guide will inspire you to integrate a new plateform you like.
As reference you can check out my commit of the Sega 32x, everything necessary to integrate the plateform and virtua fighter as example game is in that commit.
EDIT: Since I wrote this post integrated additional plateforms
Step 1: Get the emulator source and integrate it in the repo
The emulator must implement the libretro api to be compatible with stable-retro/gym-retro. You can generally find the source of the emulator you want to integrate in the libretro github repo.
In the case of sega 32x you can find it here: https://github.com/libretro/picodrive
Step 2: Integrate the emulator source in the repo
The source of emulators goes into the root /cores folder of the repo, in it’s own sub folder
/cores
    /32x
    /atari2600
    /gb
    /gba
    /genesis
    ...
A couple of things you need to make sure of:
- The Makefile actually builds the *_libretro.so lib, in the case of sega 32x it’s picodrive_libretro.so
- The resulting *_libretro.so lib is put into the root of the subfolder
- Do not put your emulator into retro/core folder, this folder should be empty, it’s setup.py that takes care of building the cores and copying them to retro/core
Details on how stable-retro checks for makefiles can be found in CmakeLists.txt:
    if(EXISTS "cores/${PLATFORM}/Makefile.libretro")
        set(MAKEFILE Makefile.libretro)
    elseif(EXISTS "cores/${PLATFORM}/Makefile")
        set(MAKEFILE Makefile)
    elseif(EXISTS "cores/${PLATFORM}/libretro/Makefile")
        set(MAKEFILE Makefile)
        set(SUBDIR libretro)
    else()
        message(FATAL_ERROR "Could not find Makefile.")
    endif()
As you can see it also checks for Makefile.libretro if there no Makefile found. Sometimes emulator core makefiles compiles for other targets as in the case of Sega 32x, so I had to erase the Makefile content and make it point to makefile.libretro (or I could have just deleted the Makefile but haven’t tested that)
You then need to create a json file and put in the cores root folder, in the case of Sega 32x it’s called 32x.json
{
    "32x": {
        "lib": "picodrive",
        "ext": ["32x"],
        "keybinds": ["X", "Z", "TAB", "ENTER", "UP", "DOWN", "LEFT", "RIGHT", "C", "A", "S", "D"],
        "buttons": ["B", "A", "MODE", "START", "UP", "DOWN", "LEFT", "RIGHT", "C", "Y", "X", "Z"],
        "types": ["|u1", ">u2", ">u4", "|i1", ">i2", ">i4", "|d1", ">d2", ">d4", "<d4", ">d6", ">d8", ">n4", ">n6", ">n8"],
        "overlay": ["=", ">", 2],
        "actions": [
            [[], ["UP"], ["DOWN"]],
            [[], ["LEFT"], ["RIGHT"]],
            [[], ["A"], ["B"], ["C"], ["X"], ["Y"], ["Z"], ["A", "B"], ["B", "C"], ["A", "X"], ["B", "Y"], ["C", "Z"], ["X", "Y"], ["Y", "Z"]]
        ]
    }
}
- lib field is the name of the libretro emulator (not the plateform)
- ext is the extension for the rom file
-
rambase (absent in 32x.json) is probably the trickiest field, rambase is the starting address in ram for the game’s usage You can see in the source the details on how it handles the rambase To find it you need to check the emulator source or the dev docs about the console/plateform you want to integrate. In the case of the 32x I did not put any and seems to still work. According to the source it seems rambase is used to limit the scope of searchable ram for variables so not a hard requirement
- keybinds are default keyboards keys that corresponds to the buttons on the gamepad
- buttons are the available buttons on the gamepad
- types are the available types read from ram, more info here in the docs
- overlay: TODO
- actions are the available actions for the model, how actions are defined can be found in the docs
Step 3: Add the emulator in CmakeLists.txt and setup.py
So as stated above setup.py and CmakeLists.txt takes care of building your emulator core (along the integration tool and tests) and copying it to retro/core when the user installs stable-retro.
In setup.py add your emulator core in the list:
platform_globs = [
    "*-%s/*" % plat
    for plat in [
        "Nes",
        "Snes",
        "Genesis",
        "Atari2600",
        "GameBoy",
        "Sms",
        "GameGear",
        "PCEngine",
        "GbColor",
        "GbAdvance",
        "32x",
    ]
]
In CmakeLists.txt, add in the list as well
add_core(snes snes9x)
add_core(genesis genesis_plus_gx)
add_core(nes fceumm)
add_core(atari2600 stella)
add_core(gb gambatte)
add_core(gba mgba)
add_core(pce mednafen_pce_fast)
add_core(32x picodrive)
Step 4: Update tests for your emulator
While this step is not strictly necessary to make it work, it is highly recommended you do this step as it will help debug problems. Also it is necessary if you want to commit in the master branch of stable-retro
In emulator.cpp add your emulator name at the end of the list:
for (const string& core : { "fceumm", "gambatte", "genesis_plus_gx", "mednafen_pce_fast", "mgba", "snes9x", "stella", "picodrive" }) {
Also add the associated test rom name in the list.
vector<EmulatorTestParam> s_systems{
	{ "Nes", "Dr88-FamiconIntro.nes" },
	{ "Snes", "Anthrox-SineDotDemo.sfc" },
	{ "Genesis", "Dekadence-Dekadrive.md" },
	{ "Atari2600", "automaton.a26" },
	{ "GameBoy", "dox-fire.gb" },
	{ "GbAdvance", "Vantage-LostMarbles.gba" },
	{ "PCEngine", "chrisc-512_Colours.pce" },
	{ "GameGear", "benryves-SegaTween.gg" },
	{ "Sms", "blind-happy10.sms" },
	{ "32x", "Palette-Tech-1-Demo.32x" },
};
The test rom is used for various unit tests. A simple tech demo is enough but since it’s commited in the repo you need to find a public domain rom. You can put it in the tests/roms folder.
After that you should be able to run tests/test-emulator binary to see if all tests passed (loading roms, setting values, etc)
Step 5: BIOS
Some emulators need the BIOS file to function. For the 32x it’s not needed but for Sega CD and Saturn for example you will need to place the BIOS file in /retro/cores directory.
To know which BIOS file (along with checksum) to use you can refer to the libretro docs for each core
Step 6: Accessing RAM
In order for stable-retro(and the integration tool) to access RAM the libretro emulator core supports these functions:
void *retro_get_memory_data(unsigned id)
size_t retro_get_memory_size(unsigned id)
void *retro_get_memory_data(unsigned id)
{
   switch (id)
   {
      case RETRO_MEMORY_SAVE_RAM:
         return sram.on ? sram.sram : NULL;
      case RETRO_MEMORY_SYSTEM_RAM:
        if (system_hw == SYSTEM_MCD) {
          log_cb(RETRO_LOG_INFO, "return scd.prg_ram\n", GG_ROM);
          return scd.prg_ram;
        }
        else {
          log_cb(RETRO_LOG_INFO, "return work_ram\n", GG_ROM);
          return work_ram;
        }
      default:
         return NULL;
   }
}
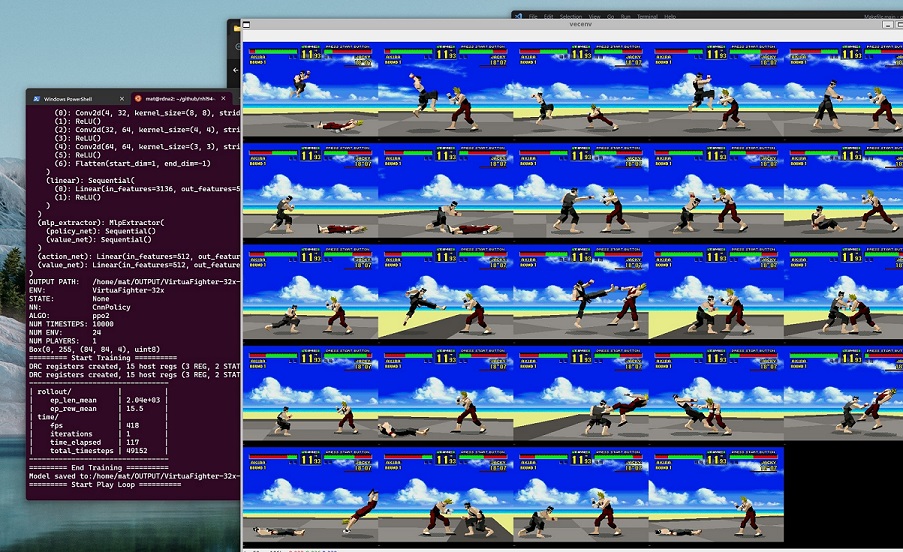
Step 6: Integrate the first game for this core
How to integrate a game is outside the scope of this guide but I made a series of video explaining how to do that for various types of games using the integration tool:
Known issues
- Some emulators requires the original BIOS of the plateform, currently there is no support in stable-retro/gym-retro for that.
- Some gamepad have continuous input such as the n64 one, there is currently no support for that as well
In the future these features might get done but there is no ETA yet
tags: stable-retro - gym-retro - emulator - machine learning - ppo